Go to Data Management → Disks.

The Disks page will open. The faulted disk will be highlighted

Click on the disk for more details. See in which bay it is placed. Our machines have support for blink, so you can detect the disk easily. To activate the blink for a disk, click on Context Menu → Blink.
NOTE: OS disks do not have support for blinking.

Go to the physical machine. Identify the faulted disk, take the bay out. Replace the disk in the bay with a new disk.
NOTE: Make sure that the replacement disk is of the same size as the one faulted.
Place the bay in the machine.
Go to Disks page again. Click the Rescan button, found in the action bar.
Click on Context Menu → Replace in pool.
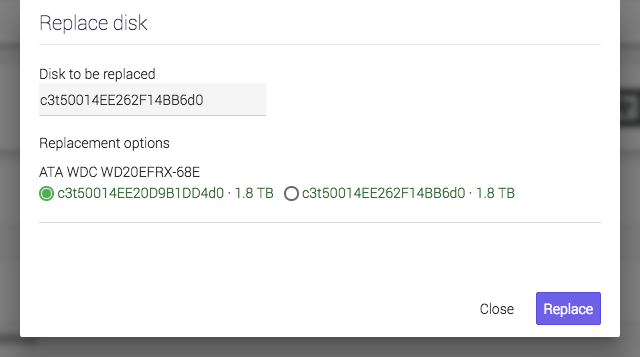
There will be a list with the available disks for replacement. Select the newly introduced one and click Replace. Now, the faulted disk is being replaced with the new disk. The system will automatically start restoring the data on the new disk.
If there was data on the newly introduced disk, a warning will appear.
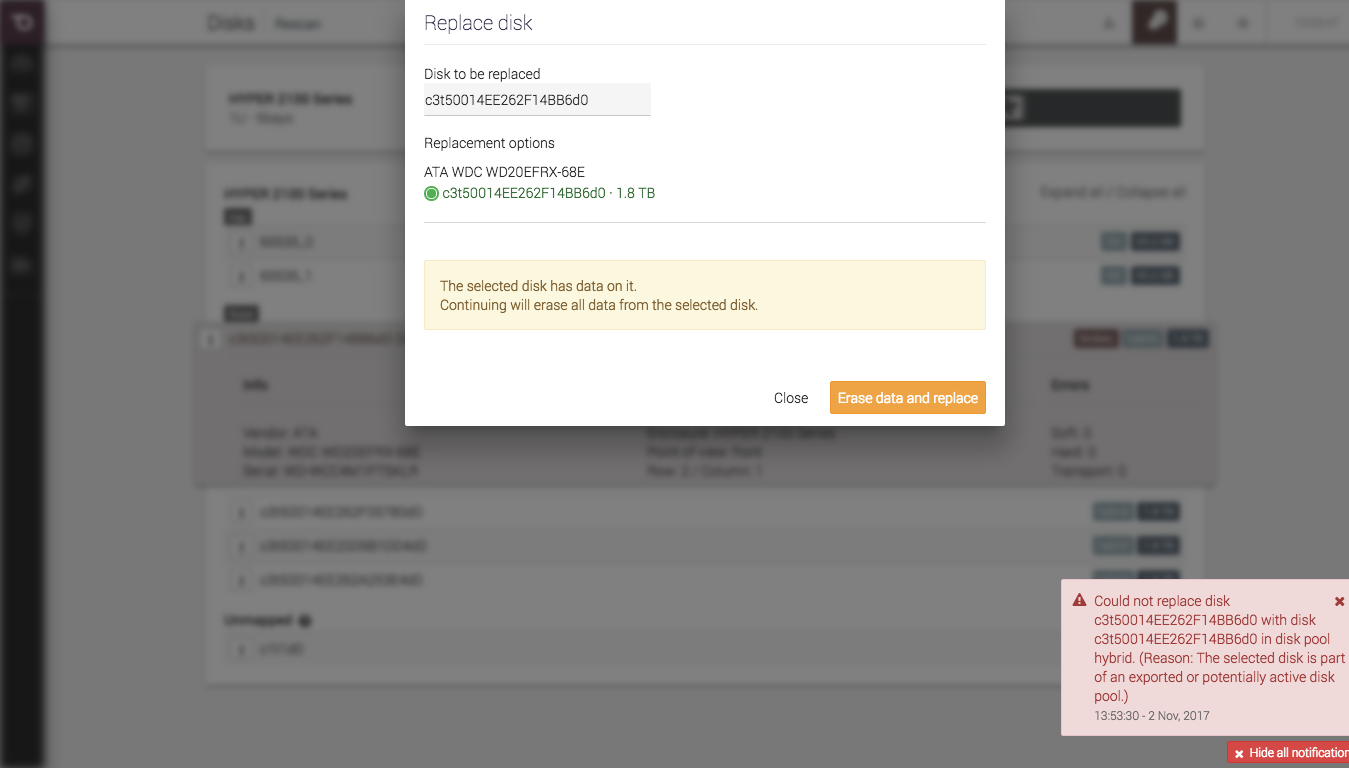
WARNING: If you are sure there is no important data on the disk, click on Erase data and replace.
You can see the building redundancy progress on the Pools page.